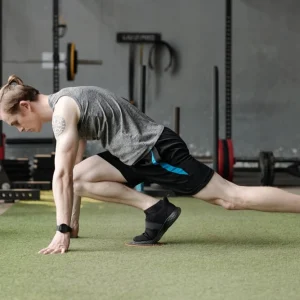
Here are five yoga poses that can be effective in helping you to manage your back pain. In Tight Hip Flexors & Back Pain we looked at three yoga poses that help to relieve the tension tight hips cause your lower back. These exercises are a low lunge, Half Pigeon and Half Happy Baby. In addition to these yoga poses, here are five more options to help you release tension in your back.
Move slowly in and out of each pose. Use your inhales to gently push your breath towards the tense area of your back. On your exhales, think of relaxing those areas of tension. Even if it doesn’t feel like anything is happening, stay focused on taking deep inhales and long exhales. Try holding each pose for at least 10 breaths.
5 Yoga Poses for Back Pain
Crescent Moon
This side body stretch will help to open up your spine laterally. It is a good way to prepare the spine for the coming forward fold and twist.
- Start standing upright with your big toes touching and your heels about an inch apart. Micro-bend your knees and lift your low belly up towards your ribs. Lengthen your tailbone down towards your heels.
- Inhale and lift your arms up overhead. Interlace your fingers and release your index finger and cross your thumbs.
- Exhale and relax your shoulders away from your ears. It is okay if your elbows need to bend slightly to keep your shoulders down.
- Inhale and lengthen your torso upwards.
- Exhale and tip your body towards the right side of your yoga mat. Let your hips shift to the left. Keep your shoulders stacked over one another like you are moving between two panes of glass. Tuck your chin slightly towards your chest to keep the back of your neck long.
- Use you inhales to bring more length into your torso. When you exhale, tip further to the right.
- Use an inhale to come back up to centre. Relax your shoulders and switch the interlace of your fingers. Repeat on the other side.
Eagle Pose
This back body stretch targets both the upper and lower back. It uses resistance to stretch out two key areas of tension in the back. By pulling your arms in opposite directions you stretch out your upper back and shoulders. The wrap in your legs helps to create space in your lower back.
- Start standing upright with your big toes touching and your heels about an inch apart.
- Inhale and lift your arms up overhead so your palms touch.
- Exhale and sweep your arms down; wrap your right arm under your left arm. Bring the palms to touch by crossing the wrists. Drop the shoulders away for the ears and keep your elbows level with your shoulders.
- Pull your arms against each other towards opposite sides of your yoga mat. You should feel a stretch across your upper back and shoulders.
- Bend into your knees and lift your right leg up. Wrap it up and over your left thigh, like you are sitting cross-legged in a chair. Squeeze your inner thighs together and try to sit down a bit lower. If your knees feel okay, you can hook your right foot behind your left calf.
- Breath deeply. Maintain the resistance in your arms and legs. For an added challenge, lift your elbows up higher than your shoulders. Sit a bit lower and squeeze your inner thighs together a bit more with every exhale.
- Release on an exhale. Step your feet together and sweep your arms up overhead. Repeat on the other side.
Standing Forward Fold
After side bending and opening up the muscles of the lower back, a forward fold brings length into the back. Keep the knees bent to take the stretch out of the hamstrings so your back can release completely.
- Start standing upright with your feet hip width apart and parallel.
- Bring your hands to your hips and with a generous bend in your knees, fold forward.
- Release your hands towards the floor. Bend your knees so that your belly and thighs touch. Let your head hang heavy.
- Either keep your hands where they are or grab at opposite elbows. Try bouncing up and down, swaying side to side and shaking you head ‘yes’ and ‘no.’
- Breathe into your back. As you inhale, push your breath towards areas of tension. As you exhale, let your torso get heavier.
- To get out of the pose, release your arms and roll up slowly. Take a few breaths when you get to standing to let your blood pressure adjust.
Supine Spinal Twist
A twist will target all areas of your back. Play around with keeping both knees bent, straightening the bottom leg or twisting your legs like in Eagle Pose.
- Start lying on your back. Bend your knees and place your feet on the floor.
- Lift your hips up and shift them over to the right a few inches.
- Stretch your arms out in line with your shoulders.
- Draw your knees towards your chest and let them fall to the left. You can look towards the right to bring the twist up into your neck.
- Inhale to breathe into the areas of tension in your back. Exhale to let your body sink deeper into the pose.
- To come out of this yoga pose, bring your head back to neutral and draw your knees back up to centre. Draw your knees into your chest and let your spine adjust to that side.
- Repeat on the other side. Move your hips left and let your knees fall to the right.
Butterfly
This stretch will help to release back tension caused by tight hip flexors. It will also realign the spine after a Supine Spinal Twist. Play around with the distance between your heels and your groin. This will change where you feel the stretch in your hips.
- Start lying on your back. Tuck your shoulder blades underneath of you so that your upper back is flush with the floor.
- On an inhale, draw your knees up into your chest.
- Exhale and place your feet on the floor. Let your knees fall out to opposite sides of your yoga mat.
- Your arms can be beside you or you can grab at opposite elbows above your head. The latter option will also being a bit more space into your shoulders.
- Take deep belly breaths. Think of your legs getting heavier on every exhale.
- To come out of the yoga pose, use your hands on the outside of your knees to close your knees together.
- Draw your knees into your chest. Wrap your arms around your shins and rock side to side to massage out your lower back.
Try and do these yoga poses regularly. This will help your back to integrate the work that you are doing.
For more incredible Yoga practices to increase your body’s ability to naturally heal itself, click here.

Matilda Shue a health blogger, but her words have the power to change your life. She is an avid reader and she loves nothing more than curling up with a good book. She always strives for perfection in everything she does, so it’s no surprise that she plans on becoming the next JK Rowling one day!


